Connecting an Ender 3 printer to a PC means linking them together so they can communicate. To do this, you need a USB cable. One end goes into the printer, and the other end goes into the PC’s USB port. Once connected, the PC can send commands and control the printer, allowing you to print things from the computer.
Want to connect your Ender 3 to your PC? It’s super easy! First, grab a USB cable. Then, find the USB port on your PC and the one on your Ender 3. Do you know how to connect Ender 3 to a PC? Plug in both ends. Now, your printer and PC can talk to each other! Get ready to unleash your creativity and print amazing things!
To connect your Ender 3 printer to a PC, you need a USB cable. First, find the USB port on your printer. Then, plug one end of the cable into the printer and the other end into the PC. Make sure both devices are turned on. Now you can transfer files and control your printer from your PC.
Step-by-Step Guide to Connecting Your Ender 3 to PC
Connecting your Ender 3 to a PC is easy with this step-by-step guide. First, find a USB cable and plug it into the printer and the computer. How To Connect Ender 3 To PC Then, turn on your Ender 3 and wait for it to start up. Next, open your 3D printing software on the PC. In the software, look for the option to connect to the printer. Click on it and follow the instructions. Now your Ender 3 is connected to the PC, and you’re ready to start printing!
Easy Ways to Establish a PC Connection with Your Ender 3 Printer
Hey, champ! Wanna connect your Ender 3 printer to your PC? No problemo! First, grab a USB cable and plug one end into your printer and the other end into your PC. Next, turn on your printer and open your slicing software. Look for the “Connect” button and click on it. Ta-da! Your PC and printer are now connected, ready to create amazing things together.
Simple Steps for Connecting Ender 3 to Your PC
Connecting your Ender 3 3D printer to your PC is easy! First, make sure the printer is turned off. Then, locate the USB port on the printer. Take the USB cable and plug one end into the printer and the other end into your PC. Turn on the printer, and it should now be connected to your PC. Now you’re ready to start printing!
Gathering the Necessary Cables and Tools:
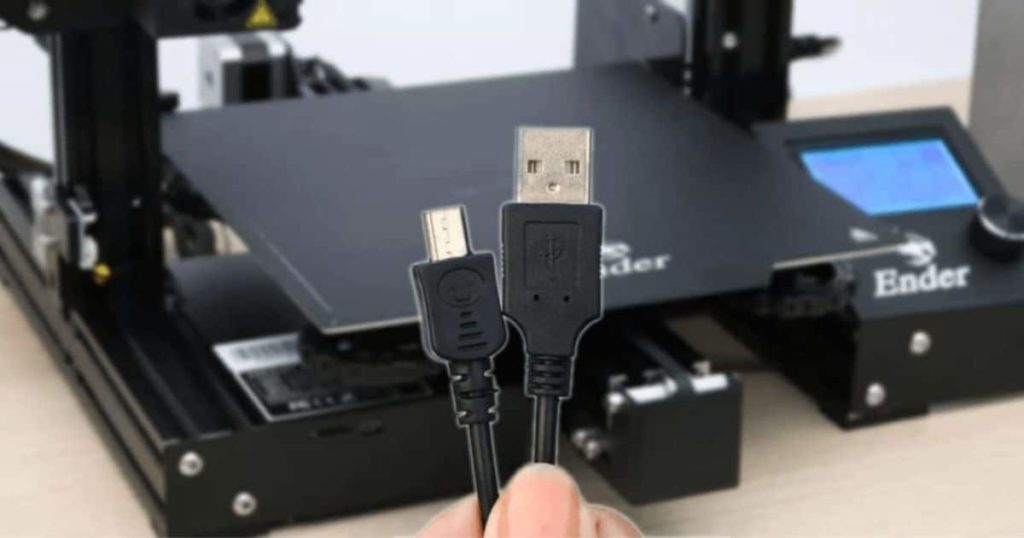
Before connecting your Ender 3 printer to your PC, you need to gather some cables and tools. Make sure you have a USB cable that fits both your printer and computer. You may also need a power cable for your printer. Additionally, keep a screwdriver handy for any necessary adjustments. Having these items ready will make the connection process much easier for you.
Configuring the Printer and PC Settings:
Configuring the printer and PC settings is important for printing things from your computer. First, make sure the printer is connected to your PC with a cable. Then, go to the computer settings and click on “Devices.” Find the printer and click “Add Printer.” Follow the instructions to finish the setup. Now you can print your homework or fun pictures easily!
Establishing the Physical Connection and Verifying Communication:
Establishing the Physical Connection and Verifying Communication is an important step in making sure devices can talk to each other. It’s like plugging in a cable to connect a computer and a printer. We need to make sure the cable is securely connected, and both devices are turned on. Then we check if they can “talk” by sending a test message or printing a page. It’s like making sure friends can chat before starting a game together.
Mastering the Art of Linking Your Ender 3 to a PC
To connect your Ender 3 3D printer to a computer, you need to follow these simple steps. First, find the USB cable that came with the printer. Then, locate the USB port on both the printer and the computer. Next, plug one end of the cable into the printer and the other end into the computer’s USB port. Once connected, you can start using software on your computer to control and print cool things with your Ender 3.
Effortless Solutions for Establishing a PC Connection with Your Ender 3 Printer
Establishing a connection between your Ender 3 printer and PC can be easy. You need a USB cable and computer software. First, plug one end of the cable into the printer and the other end into your computer. Then, install the software on your PC. Open the software and select the printer model. Click on “Connect,” and voila! Your printer and PC are connected, and ready to print amazing things!
FAQs
How do I connect my computer to a 3D printer?
To connect your computer to a 3D printer, use a USB cable to connect the printer to your computer. Install the necessary software and drivers, and you’re ready to start printing.
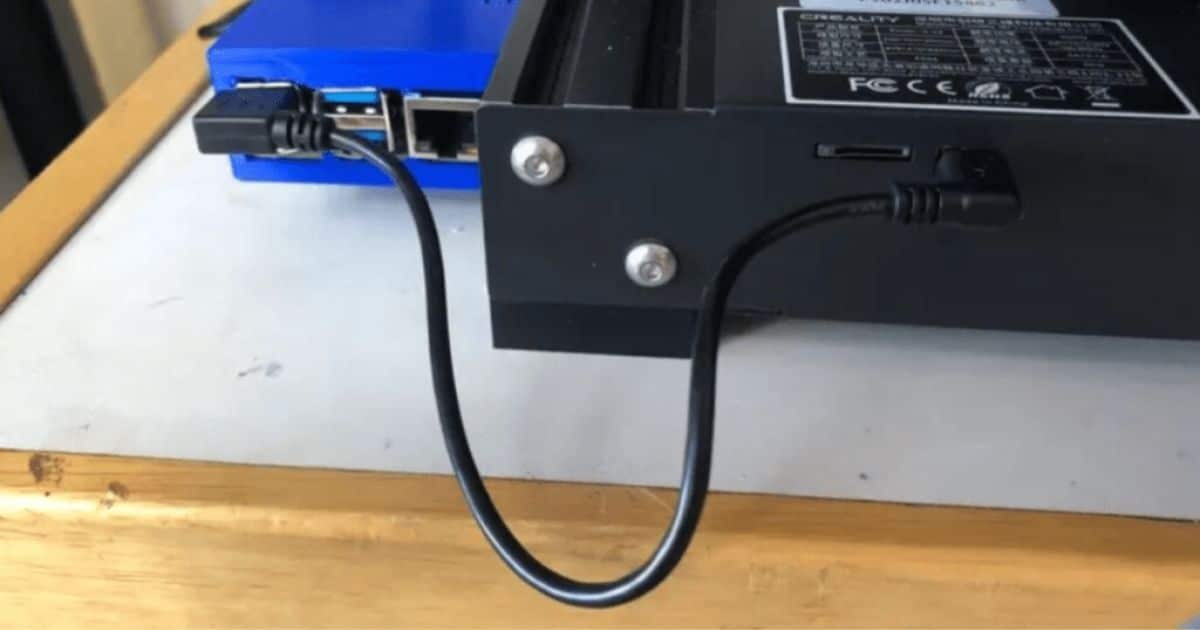
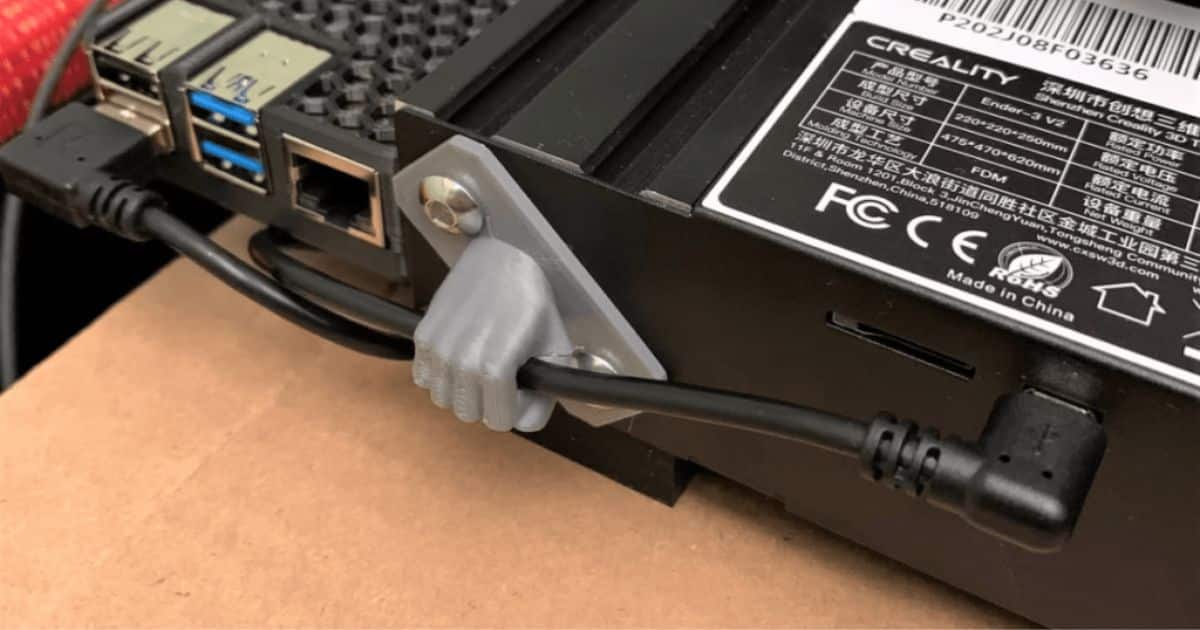
How do I connect my Creality Ender 3 to my network?
To connect your Coevality Ender 3 to your network, use a Raspberry Pi with Outpoint software installed for wireless control and printing.
How do I find my Ender 3 IP address?
To find the IP address of your Ender 3 printer, go to the printer’s menu, navigate to the “Settings” or “Network” section, and look for the “Network Status” or “IP Address” options. The IP address will be displayed there.
Does the Ender 3 have a USB port?
Yes, the Ender 3 does have a USB port.
Conclusion
In conclusion, How To Connect Ender 3 To PC Connecting your Ender 3 to your PC is pretty straightforward. You’ll need a USB cable that matches the ports on both your Ender 3 and your computer. Once you have the cable, plug one end into the USB port on your Ender 3 and the other end into a USB port on your PC. Make sure both devices are powered on. Then, you can use slicing software like Cura or Simplify3D on your PC to prepare your 3D models and send them to the printer.
Remember to select the correct printer settings and choose the right COM port for Communication. Once everything is set up, you can start printing your creations! Just click “Print” in the slicing software, and your Ender 3 will begin the printing process. It’s exciting to see your designs come to life layer by layer. So go ahead, connect your Ender 3 to your PC, unleash your creativity, and enjoy the world of 3D printing!

Brook over 3 years of professional gaming, esports coaching, and gaming hardware reviews to provide insightful expertise across PC, console, and mobile gaming.