Clipping and saving content on your PC is crucial in today’s digital age. The ability to clip stuff on your PC offers immense convenience. Whether you’re a student researching or professional organizing, it doesn’t matter. Even if you’re someone who enjoys collecting interesting articles and images, you can capture text, images, and web pages easily.
Did you know how to clip stuff on pc? Clipping on your PC helps gather and curate information. It replaces bookmarking and traditional saving methods. Clipping lets you capture specific sections or elements that matter to you. You can save important paragraphs, collect quotes, or take screenshots. Clipping is valuable for personal and professional purposes.
It helps with efficient information management. It enables easy sharing and collaboration. Clipping tools enable content sharing via email, social media, and cloud storage. Sharing ideas and discoveries becomes effortless. With some clipping tools, you can annotate and add notes to your saved content. It enhances communication and fosters collaborative discussions.
Different Methods of Clipping on PC

Various PC content clipping methods cater to diverse needs and preferences. In this section, we’ll explore three popular ways how to clip stuff on pc: browser extensions, built-in clipping tools, and dedicated clipping software.
Method 1 – Using Browser Extensions
Browser extensions are powerful tools that extend the functionality of your web browser. Many extensions cater to clipping and allow you to easily capture and save web content. Here’s a step-by-step guide to using browser extensions for clipping on your PC:
Step 1: Choose a Suitable Browser Extension
- Open your web browser and navigate to the extension marketplace or store.
- Search for clipping extensions and explore the options available.
- Read reviews, check ratings, and select an extension that best suits your needs.
Step 2: Install and Configure the Extension
Click on your chosen extension and select “Add to [Browser Name].”
Install the extension prompts and wait for it to add to your browser.
Once installed, configure the extension by accessing its settings or options page.
Step 3: Clip Content Using the Extension
- Navigate to the web page or content you want to clip.
- Locate the extension icon in your browser’s toolbar or menu.
- Click on the icon to activate the clipping mode.
- Obey the extension’s instructions to capture and save the content you want.
Step 4: Organize and Manage Clipped Content
- Access the extension’s interface or dashboard to view your saved clips.
- Use the available options to categorize, tag, or annotate your clipped content.
- For added convenience, explore more features like sharing, exporting, or syncing with cloud storage.
Method 2 – Utilizing Built-in Clipping Tools
Certain operating systems and software have clipping tools for capturing and saving PC content. Here’s a guide on how to use these tools:
Step 1: Identify and Access the Built-in Clipping Tool
- Depending on your operating system, various built-in clipping tools may be available.
- The “Snipping Tool” or “Snip & Sketch” are commonly used for Windows users.
- Mac users can utilize the “Grab” application or the “Screenshot” feature.
Step 2: Open the Clipping Tool
- Search for the built-in clipping tool using your PC’s search function.
- Once found, click on the application to launch it.
Step 3: Configure the Clipping Tool Settings
- Before clipping, it’s essential to configure the settings according to your preferences.
- Adjust options like capture mode (full screen, specific area, or window), file format, and save location.
Step 4: Capture and Save the Content
- Select the desired capture mode (full screen, area, or window) and adjust the selection as needed.
- Click the capture button or use the designated keyboard shortcut to start the capture.
- Once captured, please review the content and save it to your wantable location on your PC.
Step 5: Organize and Manage Clipped Content
- Navigate to the location where you saved the content.
- Rename the file if necessary and create appropriate folders for the organization.
- Consider utilizing file tags or labels to enhance searchability.
Method 3 – Employing Dedicated Clipping Software
Dedicated clipping software provides advanced features and a seamless user experience for clipping and organizing content on your PC. Follow these steps to use reliable clipping software:
Step 1: Research and Choose a Dedicated Clipping Software
- Conduct online research and explore various dedicated clipping software options.
- Consider factors like user reviews, ratings, features, and pricing plans to make an informed decision.
Step 2: Download and Install the Software
- Visit the official website of the chosen software.
- Look for the download or installation instructions and follow them.
- Wait for the software to install on your PC.
Step 3: Familiarize Yourself with the Software Interface
- Once the software is installed, launch it.
- Take some time to explore the interface and understand the available features.
- Familiarize yourself with the clipping options, organization tools, and any extra features the software offers.
Step 4: Capture and Save Content Using the Software
- Open the content you want to clip, whether a webpage, document, or image.
- Use the designated clipping feature within the software to capture the desired content.
- Follow any on-screen instructions provided by the software to ensure a successful capture.
Step 5: Manage and Organize Clipped Content

- Access the software’s interface to view your clipped content.
- Use the available organization tools, such as folders, tags, or labels, to categorize and manage your clips.
- Take advantage of more features like annotation, search functionality, and synchronization with cloud storage services.
FAQ’s
How do you clip the last 30 seconds on a PC?
To clip the last 30 seconds on a PC, use the screen recording feature or software, set the duration to 30 seconds, and start/stop recording.
What is the command to clip on a PC?
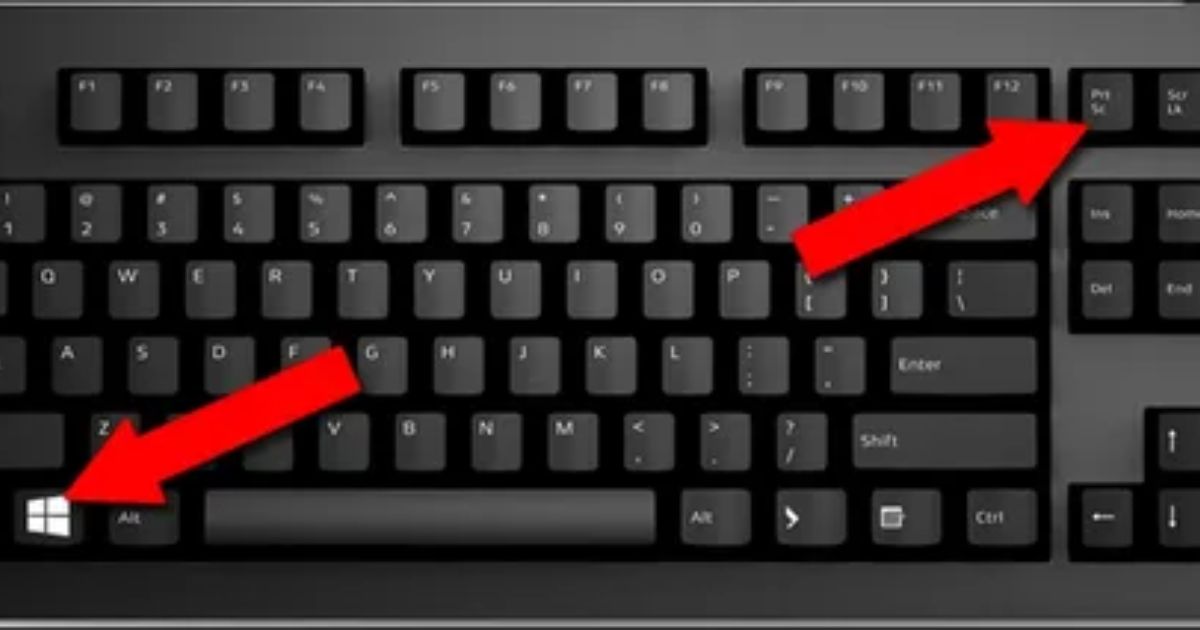
The command to clip on a PC depends on the software/tool. Press “Windows key + G” to open the Game Bar and click “Record.” Refer to the documentation for specific commands.
How do you clip the last 10 seconds on a PC?
To clip the last 10 seconds on a PC, follow the same steps as for 30 seconds but adjust the duration accordingly. Start/stop recording after 10 seconds.
Conclusion
In conclusion, learning how to clip stuff on your PC is a valuable skill that can enhance your productivity and information management capabilities. Capturing and saving text is valuable. Capturing and saving images is valuable. Capturing and saving web pages is valuable. Whether you’re a student, professional, or content organizer, you can clip and curate content using browser extensions, built-in clipping tools, or dedicated software. These methods allow you to personalize your content collection according to your preferences.
Clipping on your PC lets you create a personalized collection of resources and ideas. It helps you gather information for future use or collaboration. You can share and collaborate using clipping tools with annotation, tagging, and sharing features. Clipping on your PC helps you manage information effectively. It ensures accessibility and organization of saved content.
Read more related articles on techytrust

Brook over 3 years of professional gaming, esports coaching, and gaming hardware reviews to provide insightful expertise across PC, console, and mobile gaming.


