Capture the essence of your Gateway laptop experience with ease by mastering the art of screenshotting. Whether you need to save important information, showcase stunning visuals, or collaborate effectively, this comprehensive guide will equip you with a range of methods to capture your screen effortlessly. From utilizing the Print Screen key to employing third-party software, we will explore the various techniques and shortcuts available, ensuring you become a proficient screenshot maestro on your Gateway laptop.
Key Takeaways
- The Print Screen key is a quick and easy method for capturing screenshots on Gateway laptops.
- The Windows Snipping Tool offers customization options and a built-in image editor for capturing and editing screenshots.
- The Windows + G keys combination activates the Game Bar feature and allows for easy screenshot capture on Gateway laptops.
- The Windows + Shift + S keys provide a convenient way to capture high-quality screenshots without the need for third-party apps.
Method 1: Using the Print Screen Key
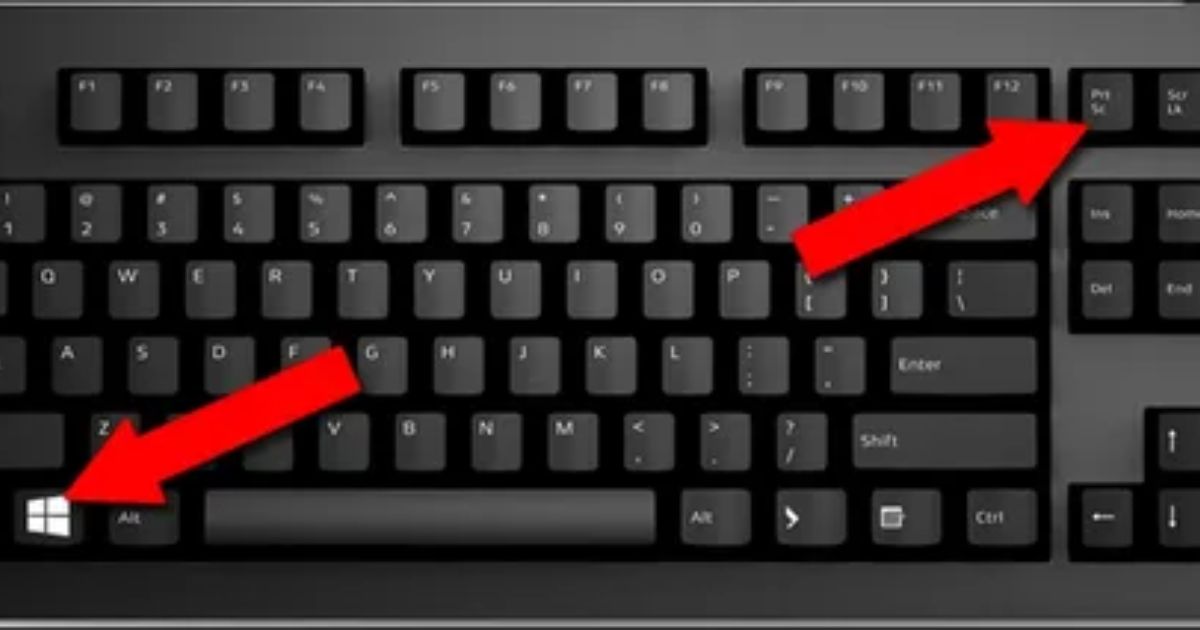
The first method for taking a screenshot on a Gateway laptop involves using the Print Screen key. This key is usually located in the top right corner of the keyboard. To capture an image of the entire screen, simply press the Print Screen key. The screenshot will be saved to the clipboard, and you can paste it into an image editing program or document. This method is quick and easy, saving you time when capturing screenshots on Gateway laptops.
Method 2: Using the Windows Snipping Tool
To capture screenshots on a Gateway laptop using the Windows Snipping Tool, follow these steps. First, open the Snipping Tool by typing “Snipping Tool” in the search bar and selecting it from the results. Next, click on the drop-down arrow next to “New” and choose the type of screenshot you want to capture, such as a full-screen screenshot or an active window. The Snipping Tool also offers customization options and a built-in image editor for editing your screenshots.
Method 3: Using Third-Party Software
One effective solution for capturing screenshots on a Gateway laptop is by utilizing third-party software’s capabilities. These third-party tools offer alternative screenshot tools that can enhance your screenshot-taking experience. Some of the benefits of using third-party applications for capturing screenshots on a Gateway laptop include additional features not found in built-in screenshot tools, compatibility with different laptop models, and the ability to customize the screenshot process to meet your specific needs. These third-party software options provide a reliable and convenient way to capture screenshots on your Gateway laptop.
Method 4: Using the Windows + G Keys Combination

Using the Windows + G keys combination is a simple and efficient method to capture screenshots on a Gateway laptop. This method utilizes the built-in Game Bar feature in Windows. To activate it, press the Windows key and the G key simultaneously. The Game Bar will appear on the screen, allowing you to take a screenshot by clicking the “Screenshot” button or by pressing the Windows key + Alt + PrtScn. The captured image can then be accessed in the “Captures” folder or easily edited using an image editing program.
Method 5: Using Windows + Shift + S Keys
Five Gateway laptop users can capture screenshots by using the Windows + Shift + S keys combination. This method allows for quick and easy capturing of screenshots without the need for any third-party apps. Here are some key features of this method:
- Free-form snip: Users can capture screenshots in any shape or form by simply dragging the mouse cursor.
- Rectangular snip: This feature allows users to capture screenshots in a rectangular shape, perfect for capturing specific areas of the screen.
- Screen snip: This method captures the entire screen, making it ideal for capturing the entire desktop or multiple windows at once.
- Advanced features: The Windows + Shift + S keys combination also provides additional options such as delayed snip, which allows users to set a timer before capturing the screenshot.
With these features, Gateway laptop users can easily capture high-quality screenshots using one of the common methods available on their devices.
Method 6: Using the Windows Key + Scroll Lock
To capture screenshots on a Gateway laptop, users can utilize the Windows key in conjunction with the Scroll Lock key. This keyboard method offers a simple and efficient way to take screenshots without the need for any additional software. By pressing the Windows key and the Scroll Lock key simultaneously, the screen will dim momentarily, indicating that the screenshot has been captured. The screenshot will be saved as an image file, typically in the JPG format, and can be found in the screenshot folder or the preferred location set in the system’s settings. This method is convenient and easily accessible, providing users with built-in options for capturing single window screenshots on their Gateway laptops.
Method 7: Using the Windows Key + PrtScn
The Windows key, combined with the PrtScn key, provides another convenient method for capturing screenshots on a Gateway laptop. By pressing the Windows key and the PrtScn key at the same moment, you can capture a full-screen capture of your laptop’s current display. This key combination is the default screenshot shortcut for Windows operating systems, including Gateway laptop windows. Now, let’s move on to method 8: using the fn key.
Method 8: Using the Fn Key
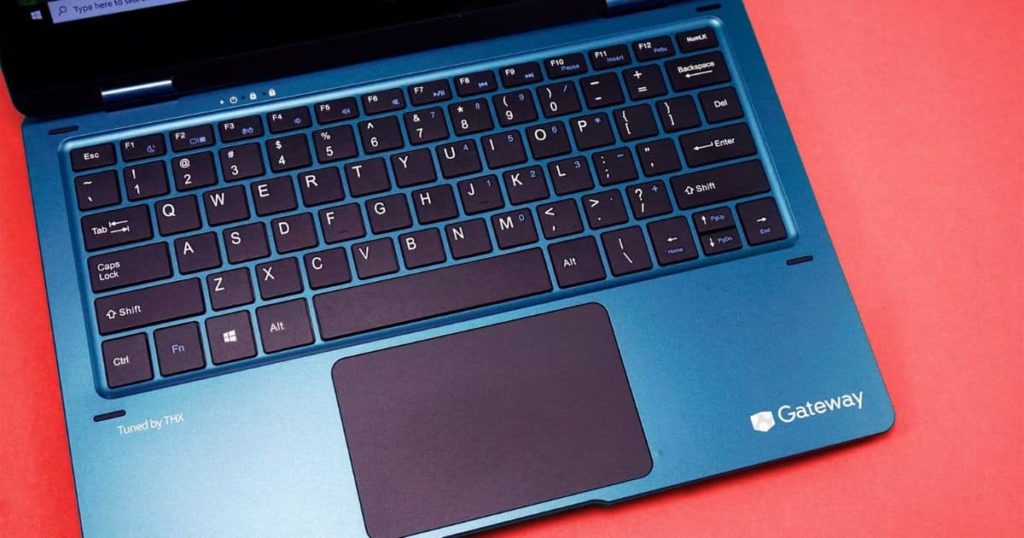
Another useful method for taking screenshots on a Gateway laptop is by using the Fn key in combination with other keys on the keyboard. The Fn key, also known as the Function key, is a modifier key found on most laptops. By pressing the Fn key along with the designated screenshot key, you can easily capture and save images of your laptop screen. This method provides a contextually relevant solution for capturing screenshots on a Gateway laptop, enhancing the overall article section on how to screenshot and improving laptop performance.
Frequently Asked Questions
Can I Take a Screenshot on My Gateway Laptop Without Using Any External Software?
Is it possible to capture screenshots on a Gateway laptop without relying on external software? This question is commonly asked by users seeking a convenient and native method for capturing on-screen content.
How Do I Access the Windows Snipping Tool on My Gateway Laptop?
To access the Windows Snipping Tool on a Gateway laptop, you can follow these steps: 1) Click on the Start menu. 2) Type “Snipping Tool” in the search bar. 3) Select the Snipping Tool from the search results.
Is There a Way to Take a Screenshot on My Gateway Laptop Without Using the Keyboard?
Yes, it is possible to capture a screenshot on a Gateway laptop without using the keyboard. There are several alternative methods available, such as using the Snipping Tool or third-party software.
Can I Edit the Screenshots Taken on My Gateway Laptop Using the Built-In Software?
Yes, you can edit the screenshots taken on your Gateway laptop using the built-in software. The software provides options for cropping, annotating, and enhancing the screenshots to meet your editing needs.
What Do I Do if the Print Screen Key Is Not Working on My Gateway Laptop?
If the Print Screen key is not working on your Gateway laptop, there are a few troubleshooting steps you can try. Check if the key is physically damaged, update your keyboard driver, or use alternative screenshot methods like the Snipping Tool or keyboard shortcuts.
Conclusion
In conclusion, there are several methods available to screenshot on a Gateway laptop. These methods include using the print screen key, the Windows snipping tool, third-party software, the Windows + G keys combination, the Windows + Shift + S keys, the Windows Key + Scroll Lock, the Windows Key + PrtScn, and the Fn key. By following these steps, users can easily capture and save screenshots on their Gateway laptops.

Brook over 3 years of professional gaming, esports coaching, and gaming hardware reviews to provide insightful expertise across PC, console, and mobile gaming.
